 Rank One Pro
Rank One Pro
Rank One Pro
This tutorial will guide you through adding a new student to the Rank One Pro system. Students must be added by a school employee with appropriate administrative access. It's important to note that student information must match your official school records exactly—you cannot create or assign student IDs. The student ID must correspond to an existing record in your system to ensure accurate data management. Once a student is successfully added, they will be accessible to all users with appropriate permissions.
Navigate to your Rank One Pro dashboard and log in with your school employee credentials. You will need administrative access to add students to the system.
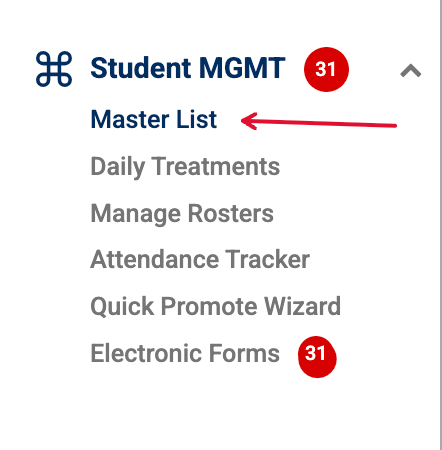
From the main dashboard, locate and click on the Athlete Management section. This is where you'll manage all student-related information and records.
Within Athlete Management, select Master List. This displays all students currently in your system and provides the interface for adding new students.
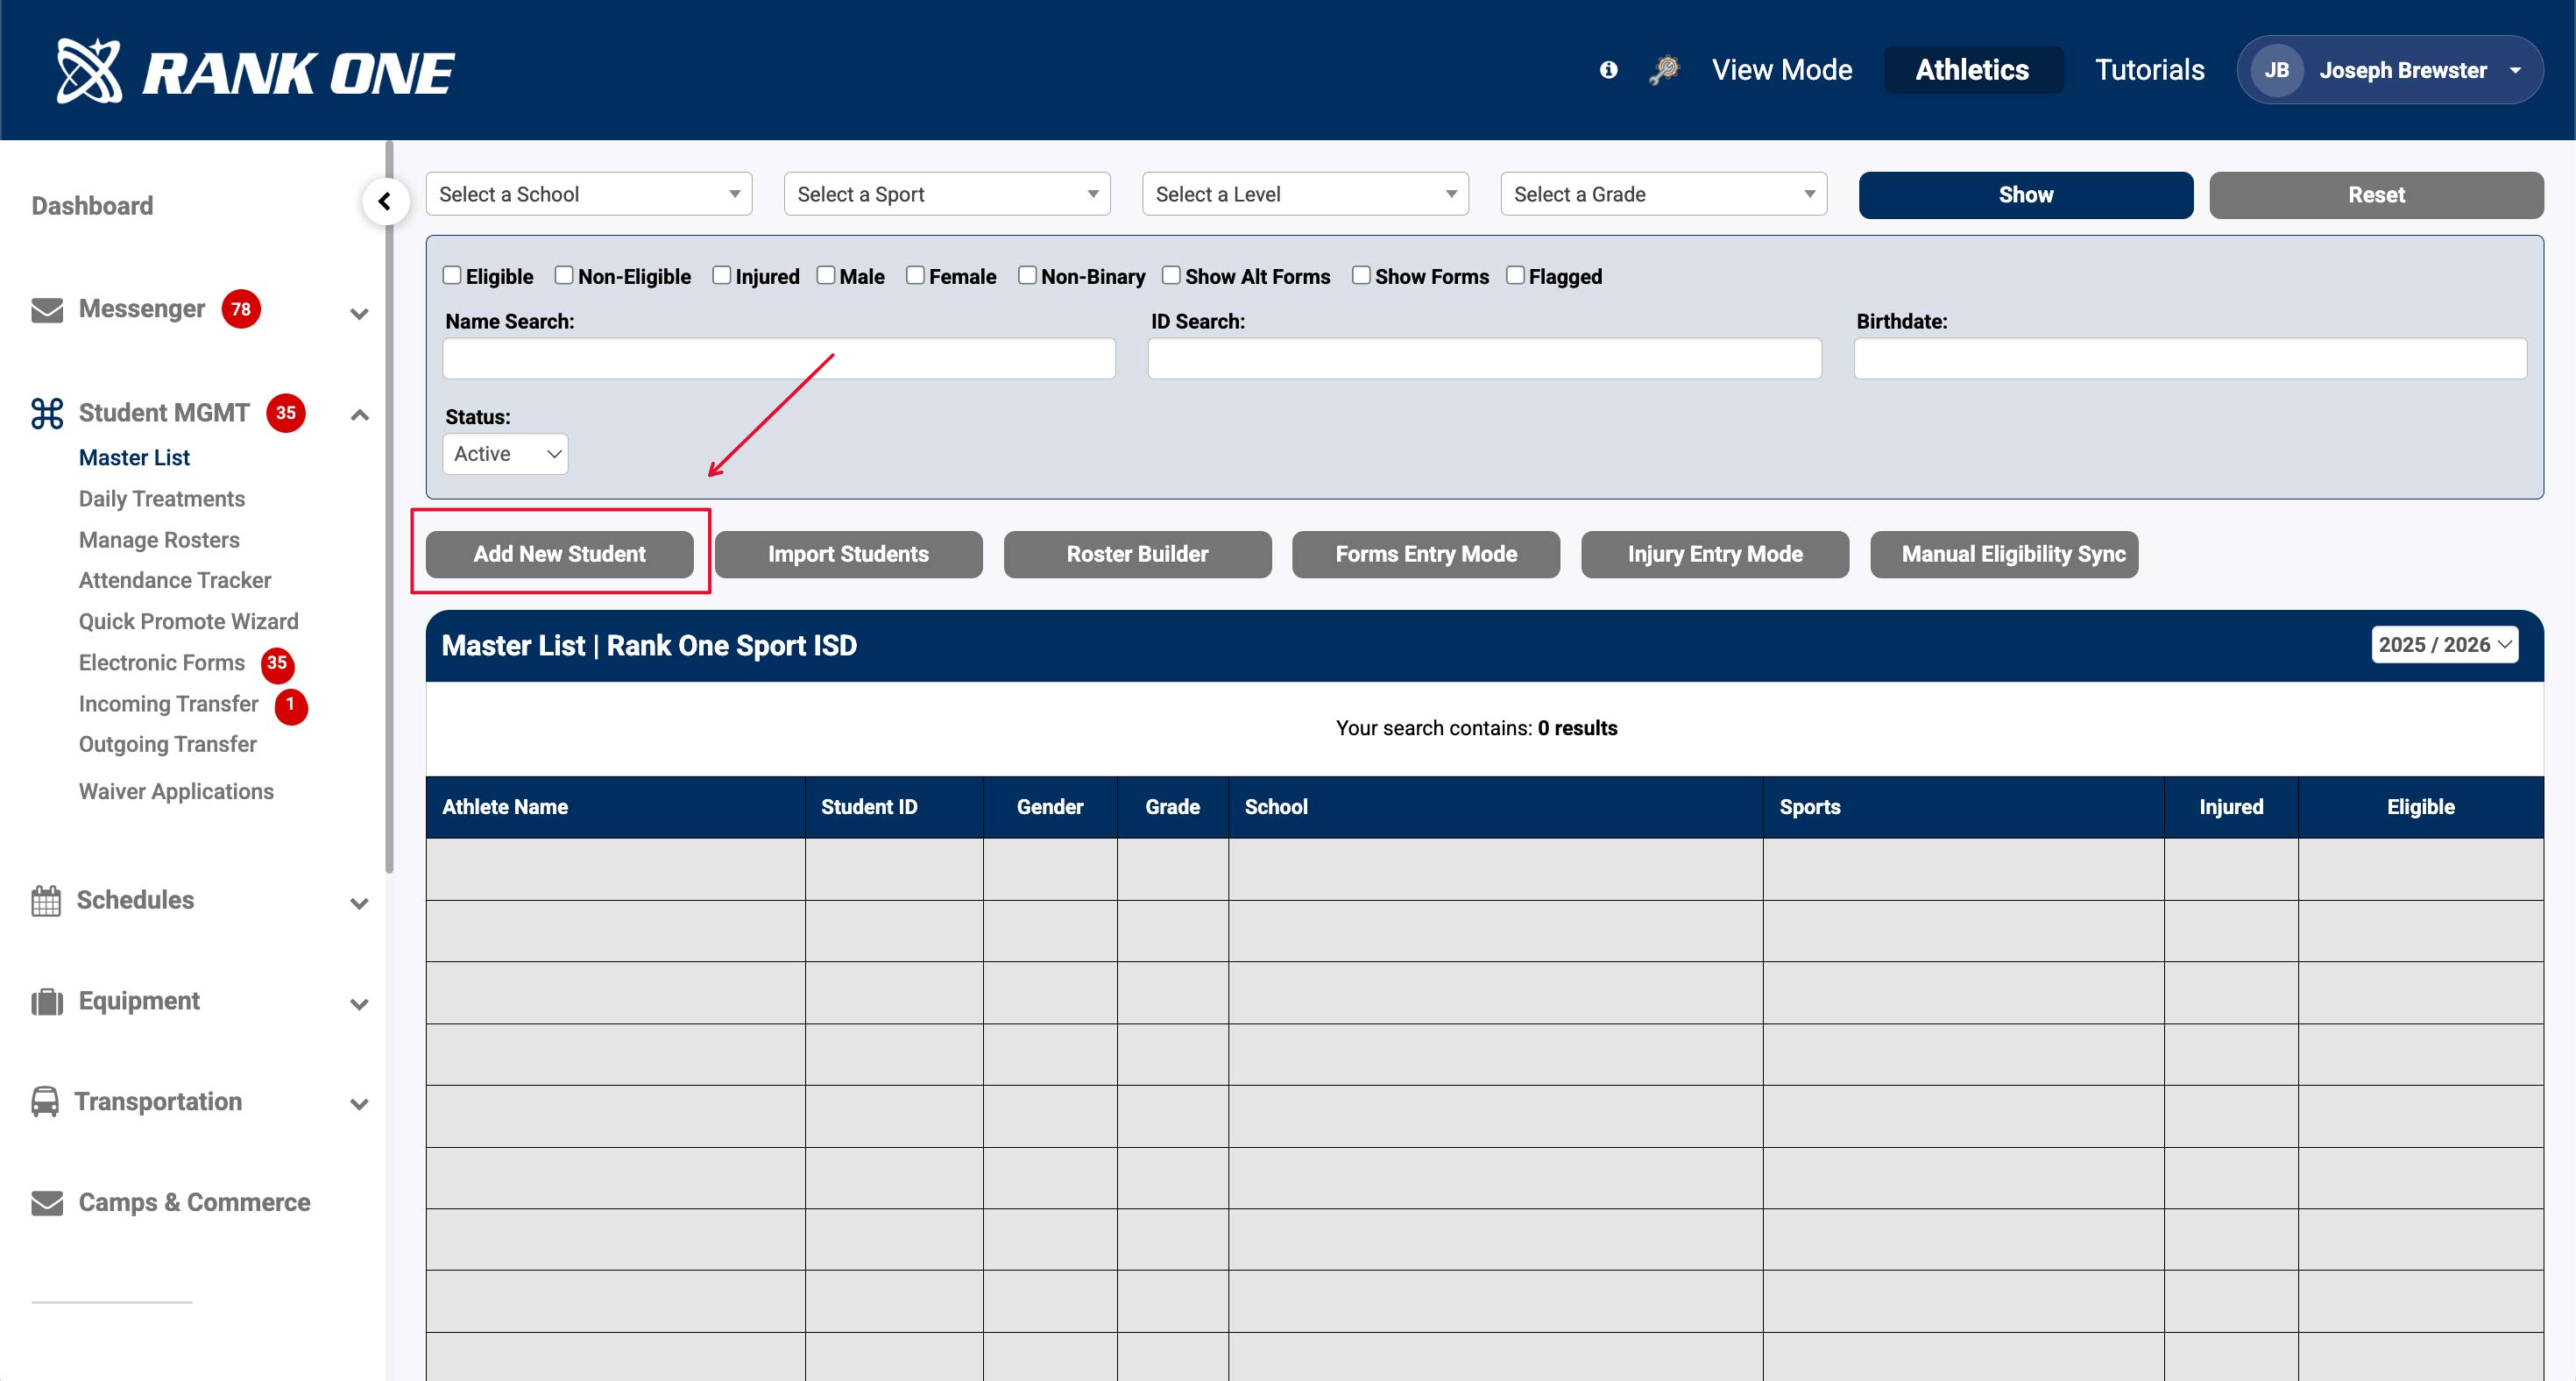
Look for the Add Student button on the Master List page. This button will open the student entry form where you'll input the new student's information.
Complete the student information form with accurate data from your official school records. Required fields typically include:
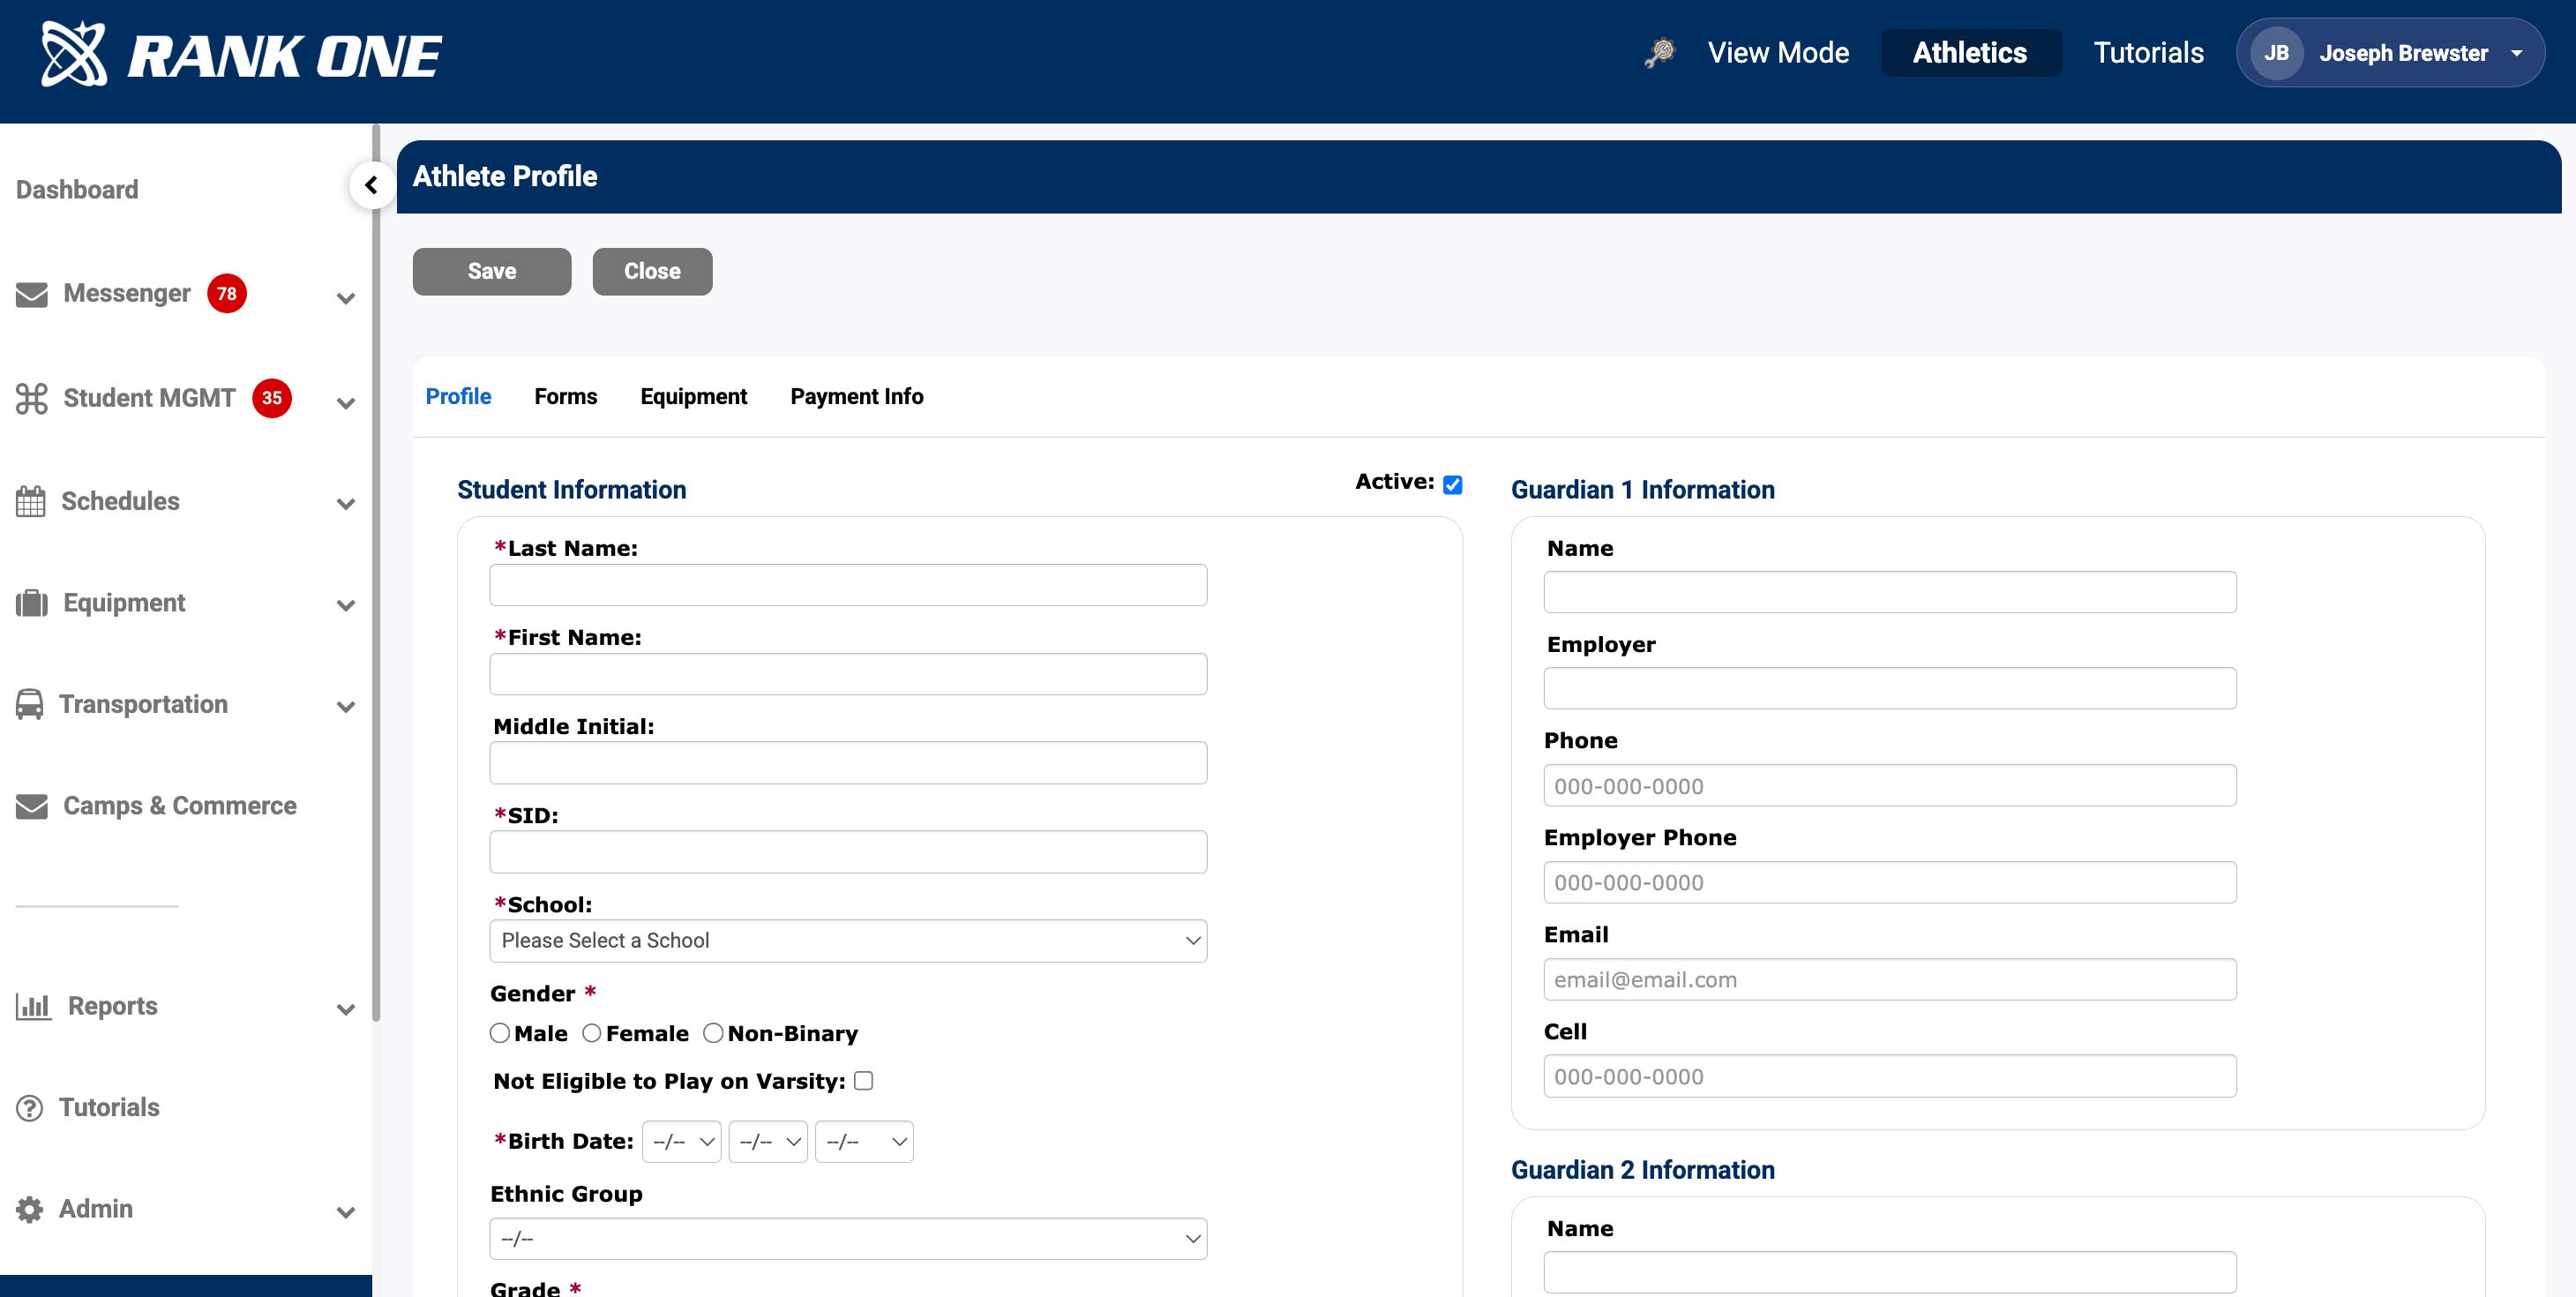
Ensure all information matches your official school records exactly
Before submitting, carefully review all entered information to ensure accuracy. Double-check the Student ID, name spelling, date of birth, and grade level against your official records.
Click the Save button to add the student to the system. You should receive a confirmation message indicating the student has been successfully added.