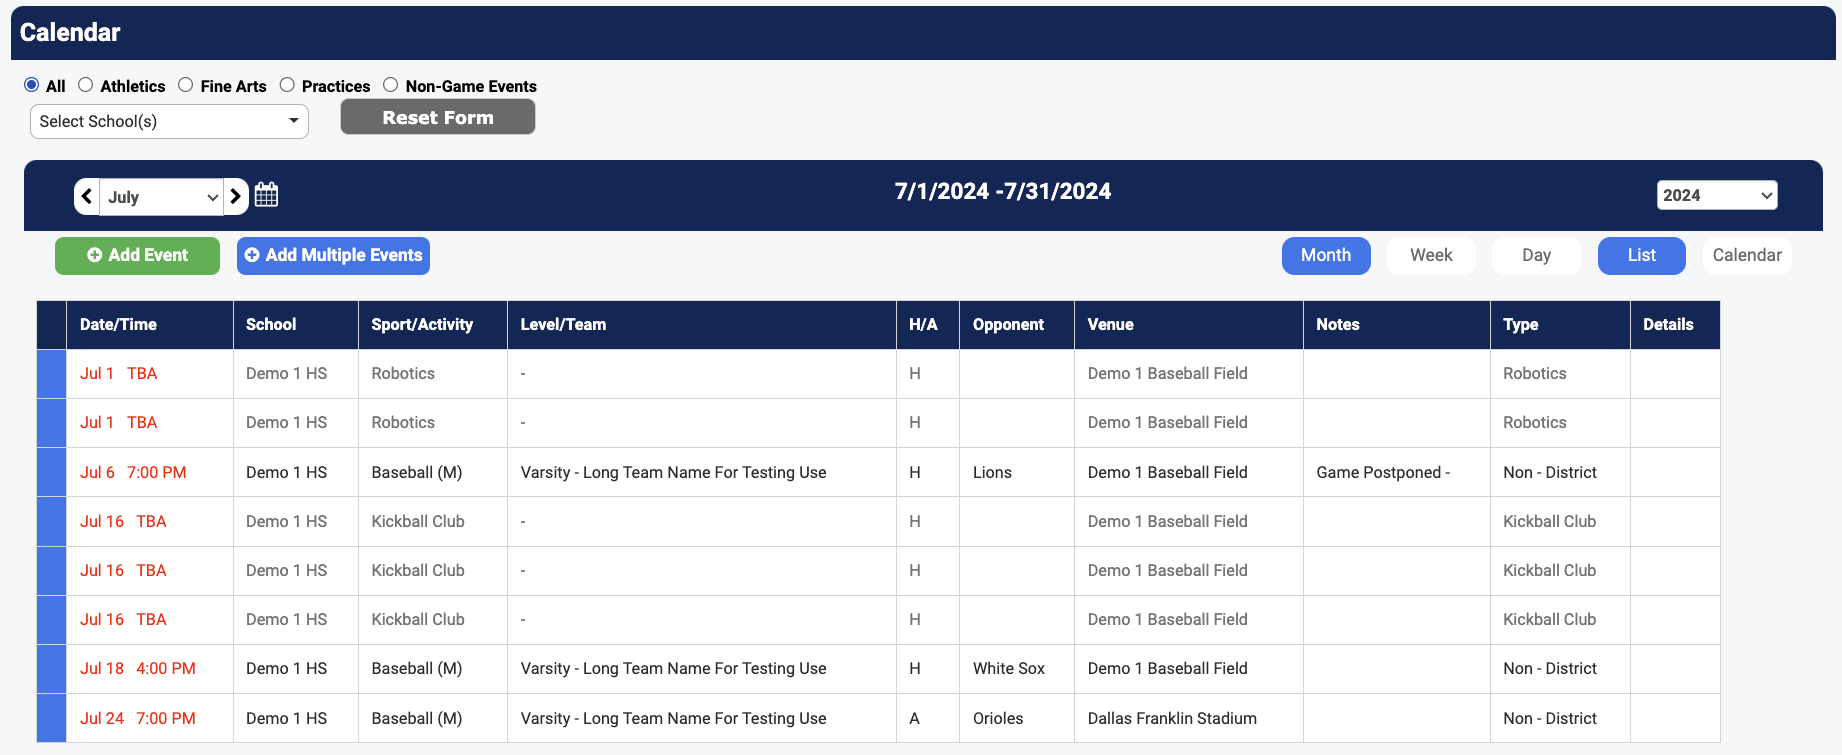
The Advanced Calendar located under the Schedules tab comes with 2 display modes: List View (default view) and Calendar View.
The calendar default will show the Activities for the current day (List View). There are several filters available to view what is scheduled throughout the district.

Use the filter icons to view specific event types. Selecting "All" shows all events. Activities display in Black text, Practices in Blue text, and Non-Game Events in Grey text. Click "Practices" to show all practices, or "Athletics"/"Fine Arts" for those specific categories.
The calendar can be used to schedule Non-Game Events organized by Categories. Non-Game Events can be pulled by category to view in a schedule format.
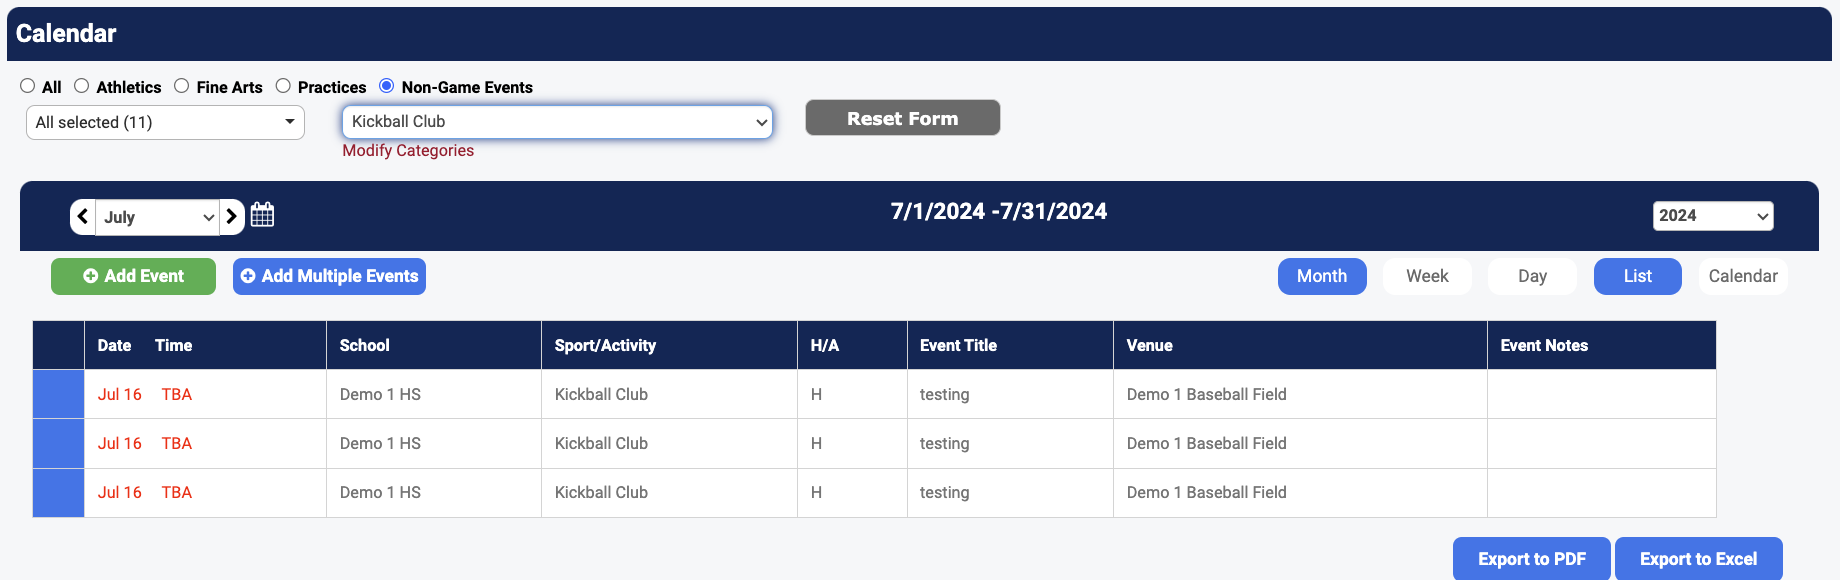
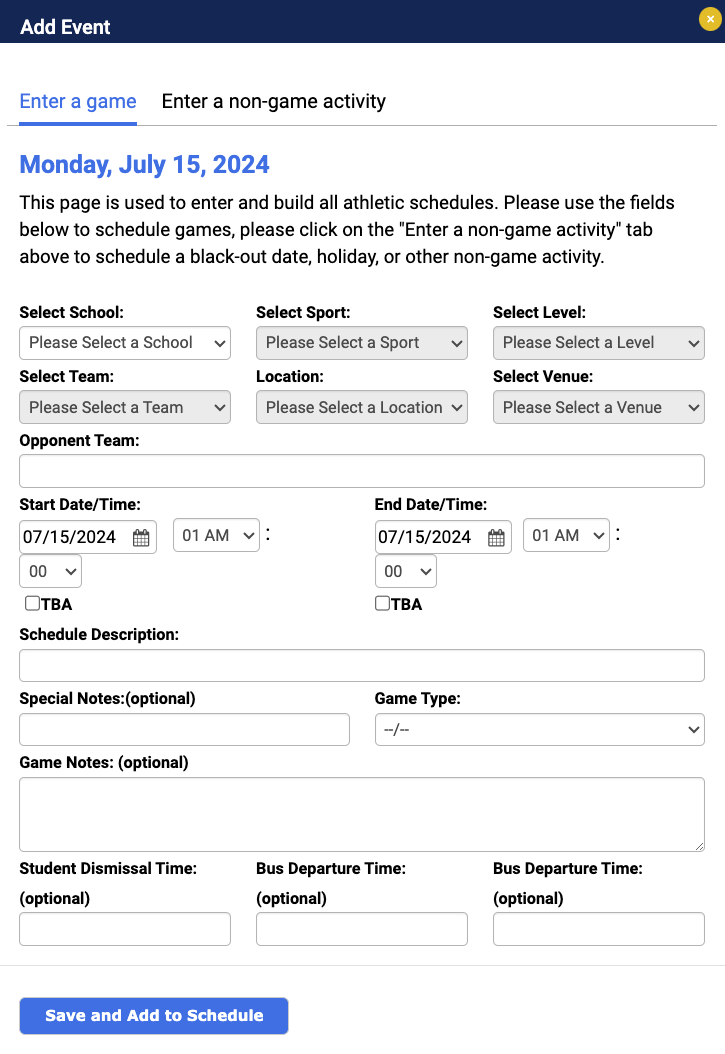
To schedule Non-Game Events, use the "Enter a Non-Game Activity" button. To add a new Category, click the "Add Event" link. Only users with Administrative Rights can add new Categories.
You can sync your Game Schedules, Practice Schedules, and Non-Game Event schedules to your personal calendar.
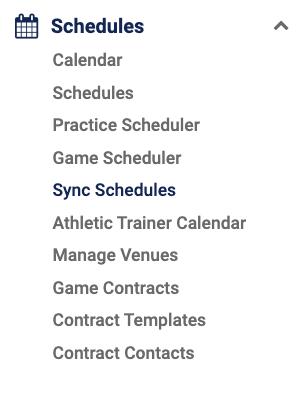
Sync all schools in the district.

Sync all schedules for a specific campus.

Sync all schedules for a specific sport.

Sync one specific schedule.
