Rank One Pro
← Back to Rank One Pro

Building a Camp Brochure

Rank One Pro · Last updated April 20, 2026

This tutorial walks you through building a camp brochure in Rank One, including entering camp details, setting up discounts, and saving the brochure.

Important: If Camps are not activated for your district and you would like to use the Camp Software, please email support@rankone.com to schedule a time to complete the application process.
1 Navigate to Camps & Commerce

Inside Rank One, hold your cursor over the Camps tab and select Camps & Commerce.

2 Add a New Camp Brochure

To build a new camp brochure, select Add New or Camp Wizard.

3 Enter Camp Details

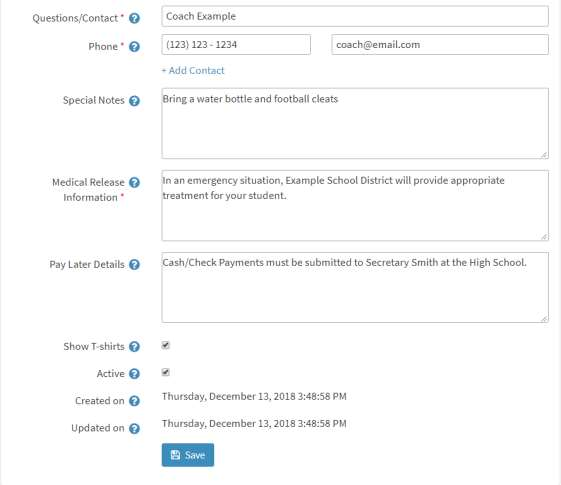
Fill in the following details for the camp:

  • School — Select from the drop-down menu
  • Sport — Select from the drop-down menu
  • Camp Name — Type the camp name in the box
  • Camp Start Date and Time
  • Camp End Date and Time
  • Date Details (optional) — e.g., "5 day Camp"
  • Open for Registration — Select when the camp will open for registration
  • Registration Close — Select when registration will close
  • Has Participation Limit — Check this box to limit the number of participants, then enter the max in the Max Registrants box
  • Enable Wait List — Check this box to notify parents when the camp is full and alert them if spots become available
  • Venue Location — Select from the drop-down menu (populated by Home venues in Rank One). If you need a venue added, email support@rankone.com
  • Price — Enter the camp cost
Camp details form with all fields

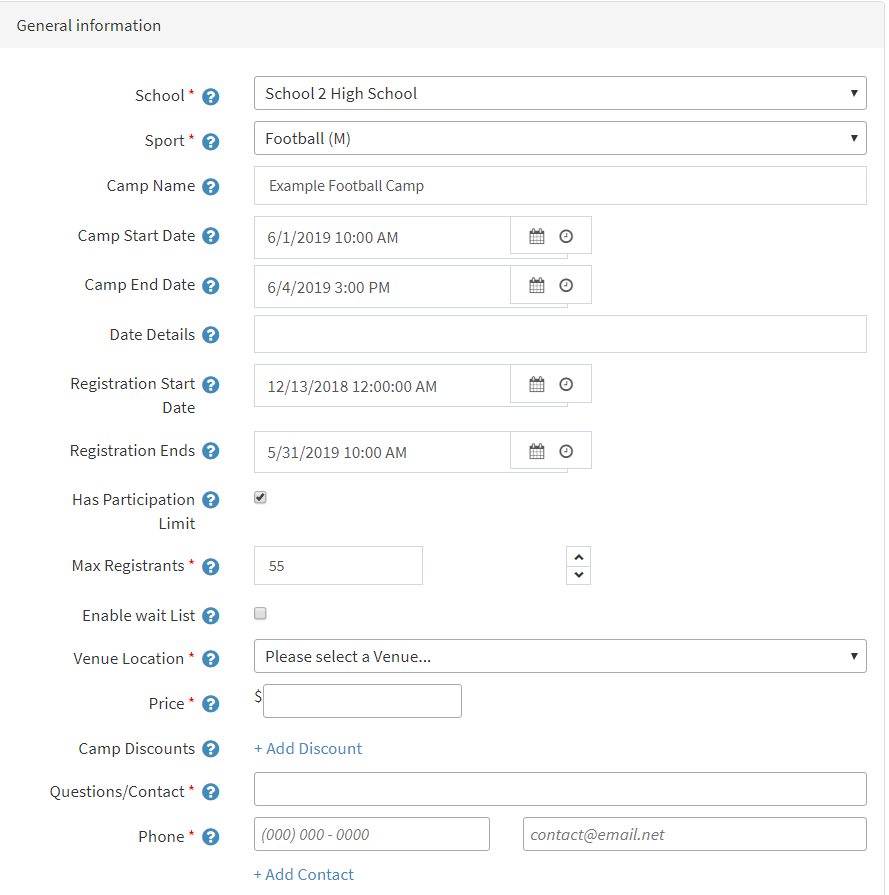
The camp brochure form with all configurable fields.

4 Configure Discounts (Optional)

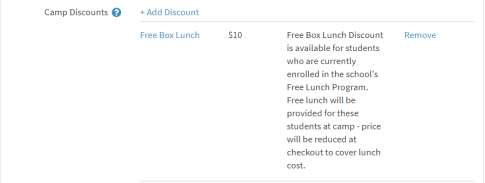
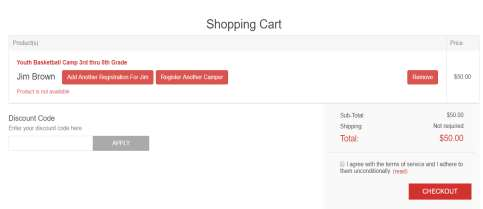
If you add a discount from the Camp Brochure, the discount will be available for any registrant who checks that they are applying the discount to their registration.

Discount example at registration

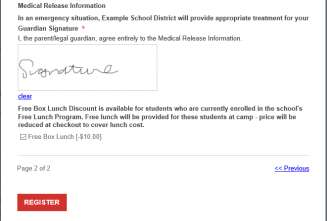
Example of a discount applied during registration.

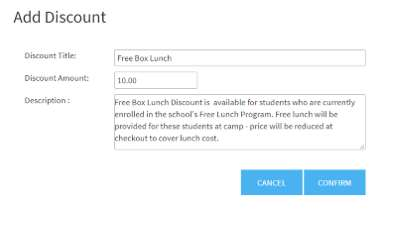
To add a discount, select Add Discount and complete the following details: Discount Title, Discount Amount (dollar amount), and Description.

Add Discount form
Tip: If you would like to control who can receive a discount by assigning a Discount Code, you must notify a Rank One Representative to set up a custom discount code. For example, if coaches' children attend camps for free or at a discounted rate, a custom code can be created for checkout.
Custom discount code example

Example of a custom discount code entered at checkout.

5 Enter Contact and Additional Information

Complete the remaining fields:

  • Contact — Enter the person in charge of the camp
  • Phone Number and Email — Enter contact details
  • Notes — Enter any information registrants may need (e.g., "Bring a water bottle and football cleats")
  • Medical Release Policy — Enter your district's policy (e.g., "In the event of an emergency the district will treat your child appropriately")
  • Pay Later Details — If allowing cash/check payments, enter where payments should be remitted
  • Show T-Shirts — Check this box to gather T-Shirt sizes from registrants
  • Active — Check this box to make the camp active
Contact and notes fields
6 Save the Brochure

When you are finished building the brochure, select Save.

Save button and completed brochure

Click Save to finalize the camp brochure.