The Rank One Camp Software provides a comprehensive solution for managing camp registration, payments, communications, and reporting. This tutorial covers how to use the Camp Wizard, Manage Camps, and Camp Reports features.
Getting Started
To enable the camp software for your district:
- Send an email to info@rankone.com and ask that the camp software be enabled. There is no charge to use the camp software.
- A Rank One staff member will assist with the initial setup, which takes less than 10 minutes.
- Once activated, you can begin setting up your camps.
Overview
The software uses three main tabs to create and manage camps:
- Camp Wizard — Create new camp brochures
- Manage Camps — Edit and manage existing camps
- Camp Reports — Generate reports on camp data
The three camp management tabs in Rank One.
Part 1: Using the Camp Wizard
1
Open the Camp Wizard
Click on Camp Wizard from the drop-down menu to get started. The boxes on the left side populate the brochure as you fill them in — you will see the data appear in real time.
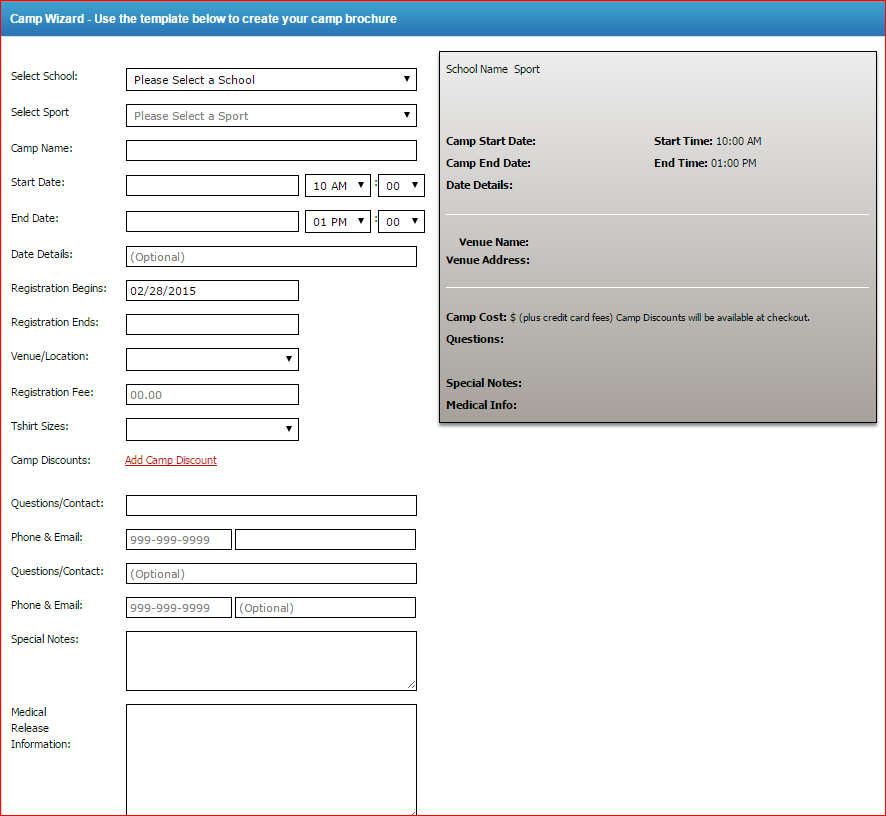
The Camp Wizard form with brochure preview.
2
Complete the Brochure Fields
Fill in each field on the left side of the wizard:
- School — Select the school the camp is associated with
- Sport — Select from the list
- Camp Name — Customize the name for parents to see
- Start Date/Time and End Date/Time
- Date Details (optional) — Special directions for parents
- Registration Open/Close — Controls when the brochure is active and when registration closes
- Venue — Select from the list or add via the Facilities tab
- Cost — Use the correct format (e.g., 50.00)
- T-Shirt Size — Select Adult or Youth
- Discounts (optional) — Enter dollar amounts for employee, multiple camp, or free/reduced discounts
- Contact — Primary and optional secondary contact with phone and email
- Camp Details — Items campers need to bring, clothing requirements, etc.
- Disclaimer/Medical Release — Enter your district's camp policy (you can copy and paste from a Word document)
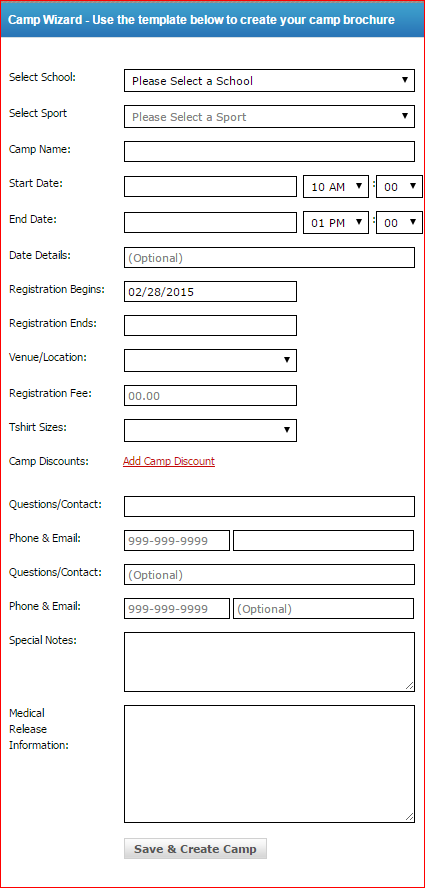
Detailed field descriptions for each entry in the Camp Wizard.
Important: Make sure you save your work when finished by clicking the Save button at the bottom of the wizard.
Part 2: Managing Your Camps
3
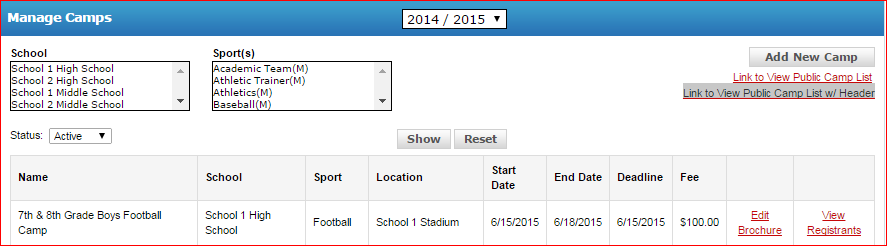
Access the Manage Camps Tab
Once a camp is set up using the Camp Wizard, it is maintained using the Manage Camps tab. From here you can:
- See the list of all camps and filter by campus
- Edit brochures using the Edit Brochure button
- View who has signed up using the View Registrants button
- Access the hyperlinks for your website (see "Link to View Public Camp List w/ Header" in the top right corner)
Copy and paste the link on your website to give parents access to the camp registration pages.
4
Edit a Brochure
Once a camp brochure has been created, you can edit it by clicking the Edit Brochure button next to the camp.

5
View and Manage Registrants
Click the View Registrants button to see the list of registered campers along with their financial details showing payment status and outstanding balances.
The registrant list displays payment status and balance information.
6
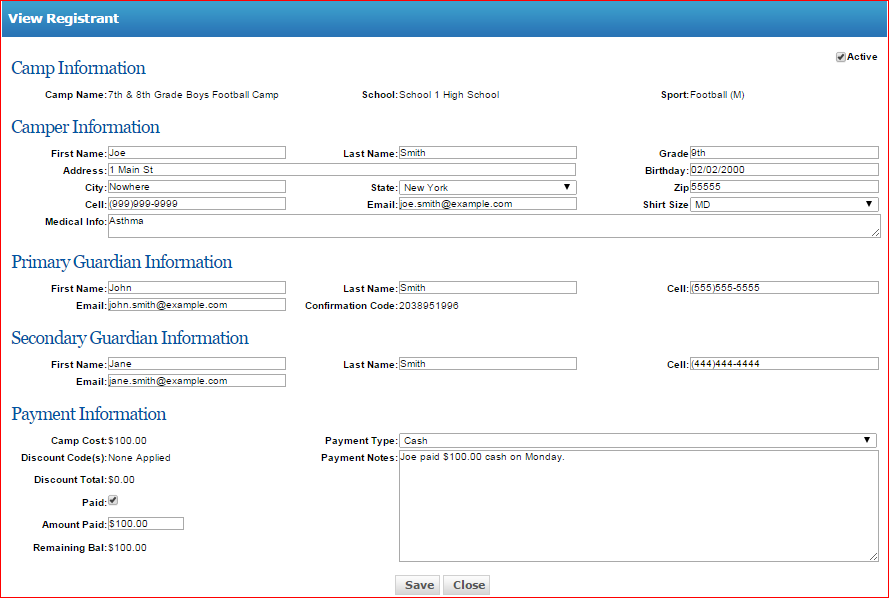
Edit a Registrant
Click the Edit button next to a registrant to:
- View a camper's registration details
- Remove the camper from the list by unchecking the Active box
- Change payment status from "Balance Due" to "Paid" by checking the paid box and entering the amount paid, payment type, and any notes
Use the Edit tab to update payment information or remove a registrant.
Part 3: Camp Reports
7
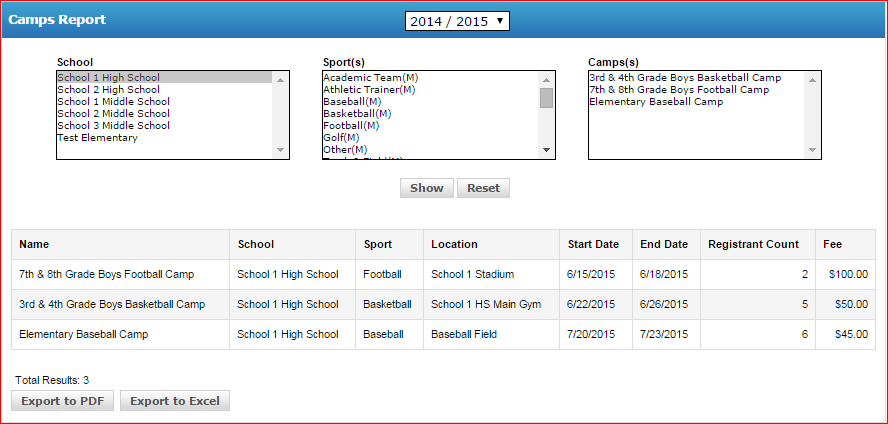
Generate Camp Reports
The Camp Reports generator allows you to:
- Pull up camps by campus, sport, and camp name
- Export camp information to Excel and PDF formats
Tip: There is no charge to use the camp software. Email info@rankone.com to get started.