This tutorial covers how to view your team rosters, remove athletes, move athletes between rosters, and export roster data in Rank One Pro.
From the Dashboard, hold your cursor over Student Management (under the Athlete Management section) and select Manage Rosters.
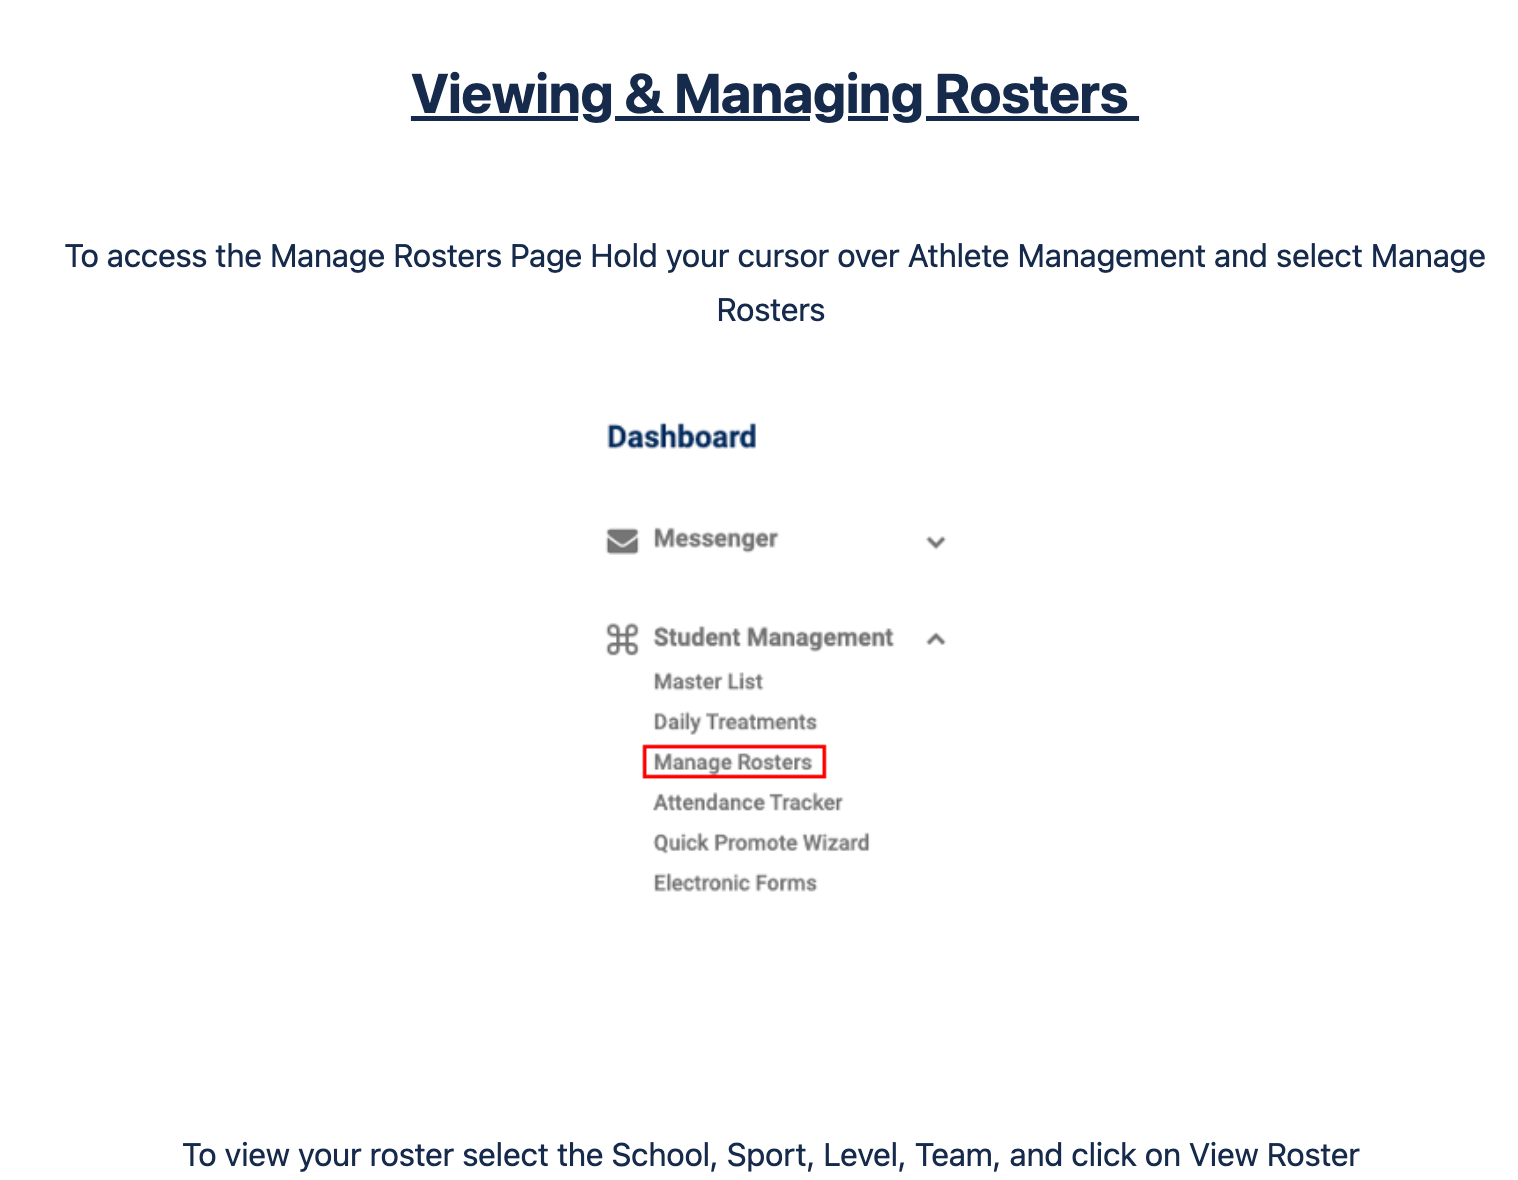
The Manage Rosters option under Student Management in the left navigation menu.
Select your School, Sport, Level, and Team from the dropdown menus, then click the View Roster button.
Your roster will appear with everyone you have added to the team. The table displays each athlete's name, student ID, gender, grade, school, eligibility status, and more.
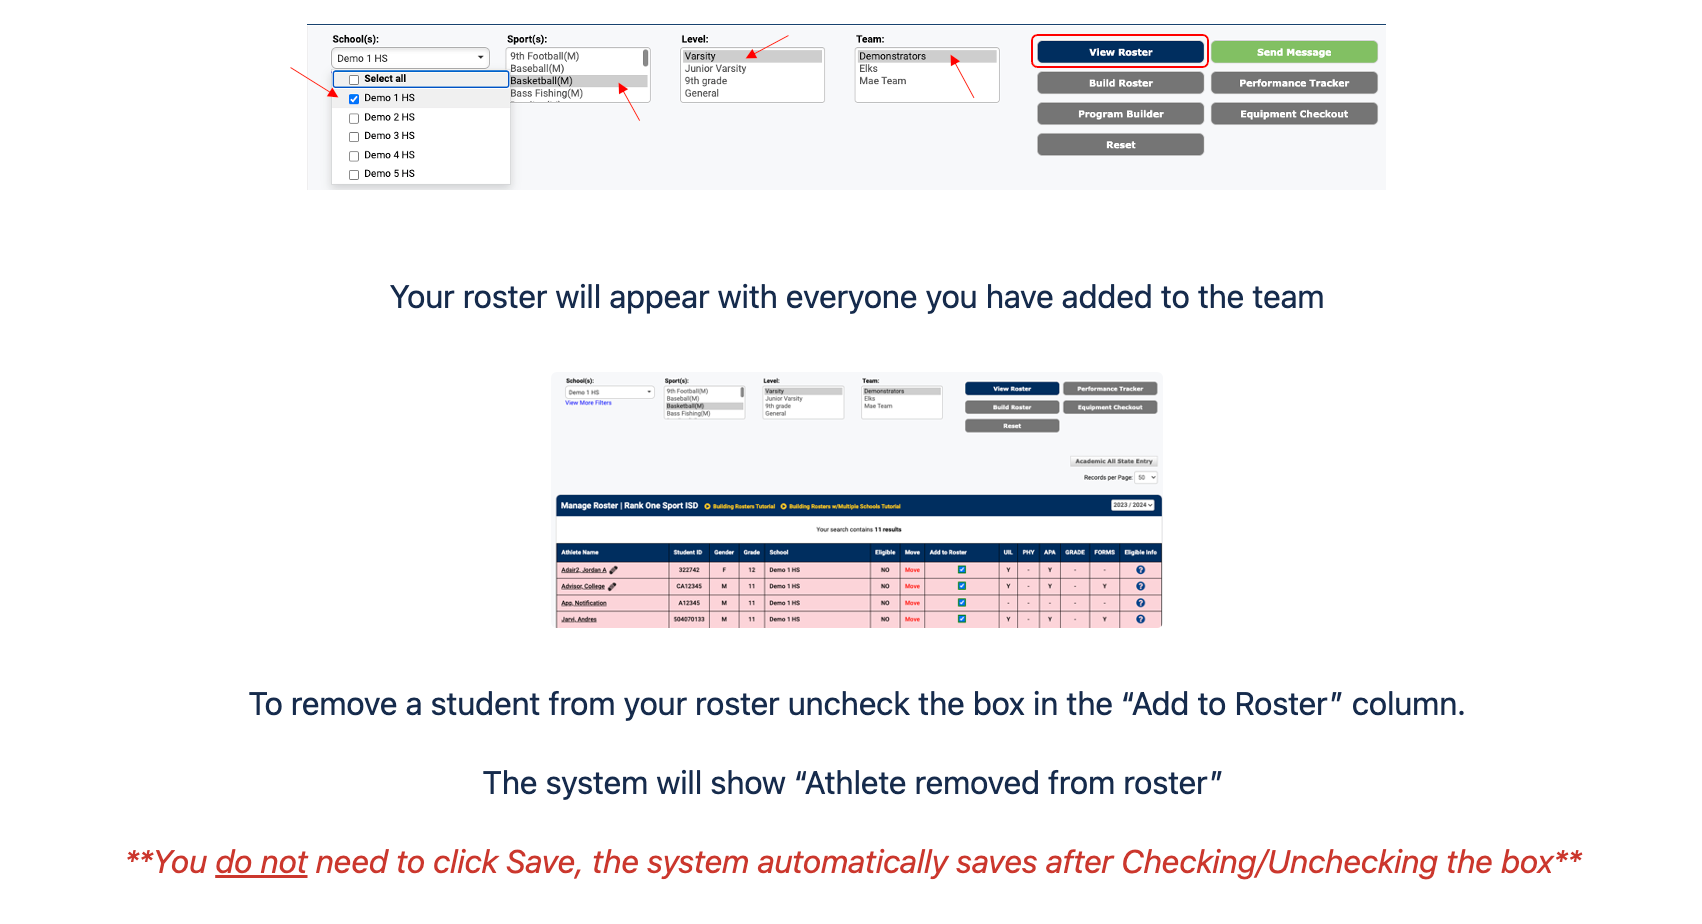
Use the filter dropdowns to select your roster, then click View Roster to display your athletes.
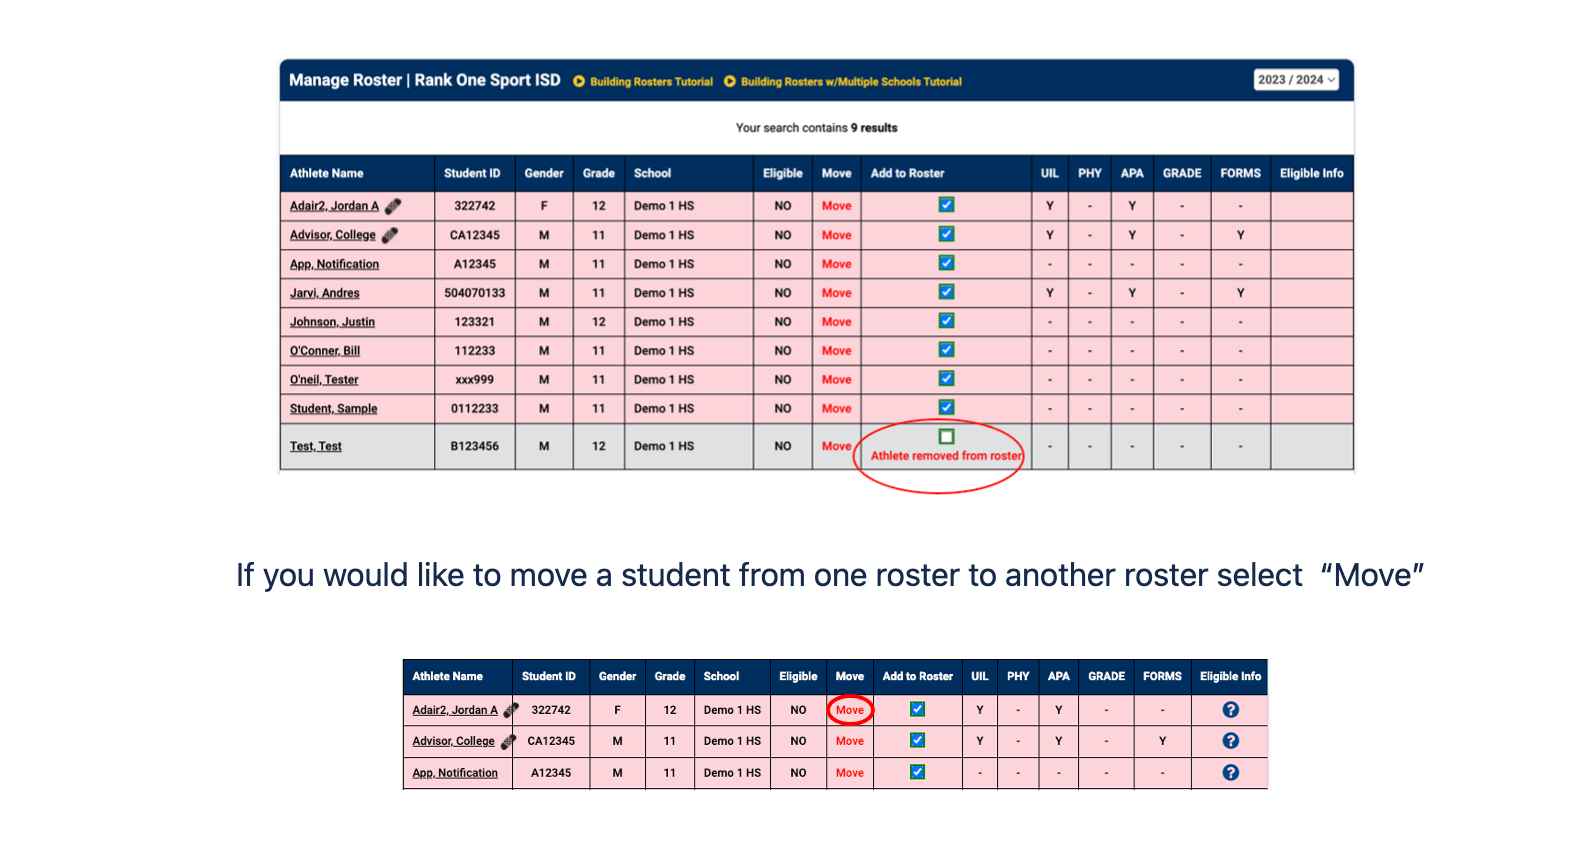
To remove a student from your roster, uncheck the box in the "Add to Roster" column next to their name. The system will display an "Athlete removed from roster" confirmation message.
Unchecking the "Add to Roster" box immediately removes the athlete from the roster.
If you would like to move a student from one roster to another, click the "Move" link next to the athlete's name in the roster table.
A Manage Roster dialog will appear listing the available level/team combinations. Place a check next to the appropriate team and click Save. The student will then be moved to that roster.
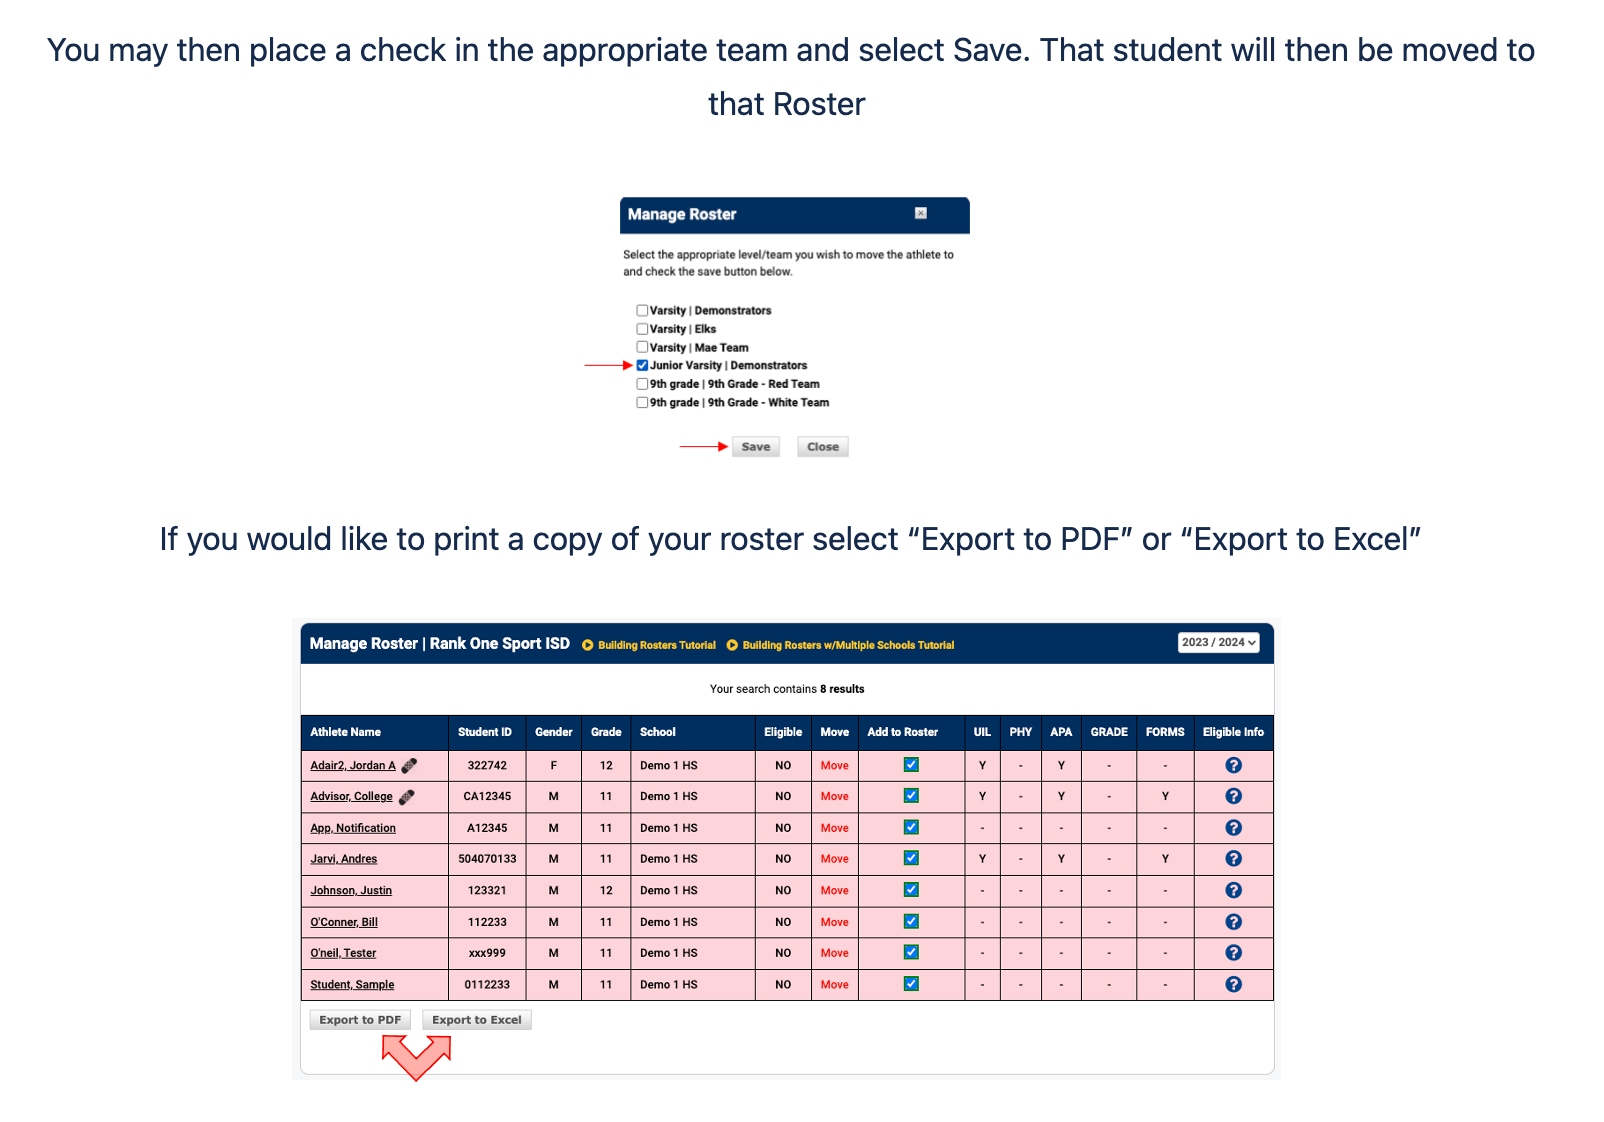
Select the destination team in the Manage Roster dialog and click Save to move the athlete.
If you would like to print a copy of your roster, scroll to the bottom of the roster table and click "Export to PDF" or "Export to Excel".